Collaborating in Simcenter STAR-CCM+ Virtual Reality
If you connect to the same Simcenter STAR-CCM+ server as other colleagues, then you can see their position as an avatar when you view the same scene. Use cases are collaborative exploration, tutoring (an experienced user introduces a novice user to virtual reality), or demonstrations (for example at a car show).
- To set up a collaborative virtual reality session, follow the procedure for a session that is connected to Simcenter STAR-CCM+, but be sure to specify Collaboration when launching the Simcenter STAR-CCM+ Server. For details of the procedure, see Connected Simcenter STAR-CCM+ Virtual Reality: Launching and Loading Scenes.
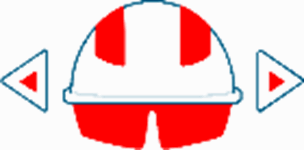
- The position and orientation of each user and their controllers are transmitted to all other users in the scene—using a different-colored hard hat avatar for each user. Interactive tools such as particle injection and palette settings are also transmitted. Hence you can see the immediate actions of all others users in the scene.

- All interaction items (plane sections, iso surfaces, clip planes, or particle seed points) are shared globally. The addition or deletion of an item is transmitted to all other users.
- Palette settings that you use to customize your virtual reality experience can be optionally shared.
All users can perform standard Simcenter STAR-CCM+ Virtual Reality actions, including addition or removal of clip planes, plane sections, isosurfaces, and particle sources. You can remove such elements regardless of which user created them.
- To share your virtual reality settings with other users, select and work with the following settings:
- Shared Settings--choose which settings are to be transmitted to other users.
- Show/Hide HUD (heads-up display, or visibility of 2D scene elements in the foreground, such as the color bar and annotations)
- Enable/Disable Fly Mode
- Show/Hide Floor and Ceiling
- Show/Hide Volume Rendering
- Increase/Decrease Particle Radius
- Increase/Decrease Particle Speed
When you share a setting with other users, link symbols, with colors corresponding to the other users, appear on the palette icon of that setting to indicate that it is shared.

- Shared Settings--choose which settings are to be transmitted to other users.
- To follow another user:As a user moves the model (scale, translate, rotate), these transforms are transmitted to the other users in follow mode.
- To stop following a user, do one of the following, depending on the follow mode you are in:
- In any mode, press both triggers (left and right) at the same time and hold them for approximately half a second.
- In Advanced - Active Tethering mode, release the trigger of your controller.
- For Advanced - Tethering mode, press the trigger once.
- In Guided Tour mode, you must press both triggers (left and right) at the same time and hold them for approximately half a second; this prevents accidental exiting from the follow mode.
- To locate a user who is not in view, look for an arrow with that user's color that points to the user's location.

When a user is behind an object in the view, the location is indicated by a diamond.
- To move closer to another user, point the controller in that user's direction and press Pull. To move farther away, press Push.
- To move the current viewpoint instantly, or teleport, to the viewpoint of another user:
- Point the laser beam of the other controller at the
 (Teleport) icon on the palette.
- Point the laser beam of the other controller at the