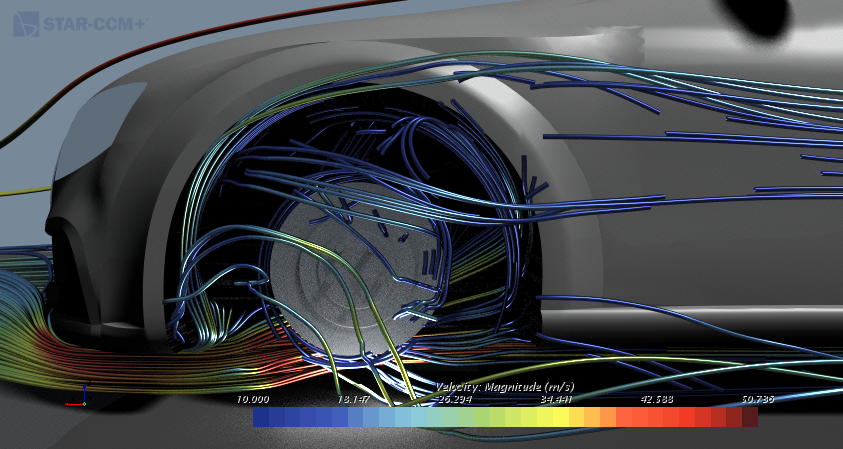
Illuminating the Wheel Arch
Using an emissive material, you can position light sources beneath the wheel arches and so achieve close-up views of streamlines passing behind the wheels.
-
To create cylinder shapes from which the light sources are formed:
-
To define a displayer for the floor lights:
- In the graphics window, switch to the scene, Advanced Rendering On.
- From the folder, drag the Floor Lights Front and Floor Lights Rear nodes into the scene display.
- In the Select Displayers dialog, double-click the Surface option in the New Displayers column. In the Input dialog, enter Floor Lights for the displayer name.
- Click OK to close the Input and Select Displayers dialogs.
- To make the floor light cylinders invisible, switch to the Scene/Plot tab, and set the Opacity property of the Floor Lights displayer to 0.0.
- Set the Representation property of the Floor Lights displayer to Geometry.
-
To define the emissive material for the light, switch to the Simulation tab, then:
- Right-click the node and select .
- Within the node, rename the Light-Emitting 1 node Bright Light.
- Select the Bright Light node and set Intensity to 4.
-
To apply the emissive material, switch to the Scene/Plot
tab, then:
- Select the Floor Lights node and set Color Mode to Preset Material.
- Select the Preset Material child node and set Material to .
- In , deactivate the Enabled property of all lights except Light 1.
-
Set the background color of the scene to Slate
Gray Light:
-
Select the node and click
 (Custom Editor) next to the color.
-
Select the node and click
-
To improve the visibility of the streamlines in the bright light:
- Select the node and activate the Enable Shadows option.
- Make the color bar of the Streamlines: Underbody displayer visible.
-
To shine emissive light into the wheel arches instead of on the wheels and
tires:
- Multi-select Tires and Wheels, right-click and select Toggle Visibility.
- Switch to the Simulation tab, then from the folder, drag the underbody node into the scene display.
- In the Select Displayers dialog, activate the Car Body option in the Existing Displayers column and click OK.
- Above the graphics window, click Save-Restore-Select Views and choose .
- Pan the scene until the front wheel is positioned around the middle.