Importing IDF Files
This section describes how to use the IDF Import Wizard.
The IDF Import Wizard is hidden by default from the Simcenter STAR-CCM+ user interface.
To import IDF files:
- Add the Import IDF File tool to the Simcenter STAR-CCM+ user interface. See Customizing a Toolbar.
-
Click the
Import IDF File icon.
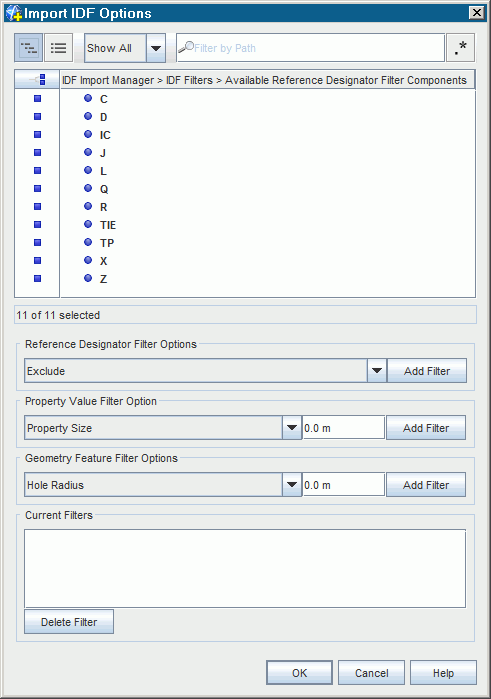
The Import IDF Options dialog appears.

-
Set the desired import options. See
Import IDF Options Panel.
-
Filter out specific components:
To omit specific components, use Exclude filters. Any selected components in the Available Reference Designator Filter Components list are excluded from the import. By default, all components are selected.
-
Filter out components based on size:
To omit all components that are smaller than a specified size, add a Property Size filter. The size that you specify corresponds to the maximum size of a bounding box that fully encloses the 2D profile of the component.
-
Filter out holes on the circuit board:
To omit holes from the circuit board, add a Hole Radius filter. Any holes which are smaller than the specified value are filtered out.
-
- Click OK.
The specified components are read into Simcenter STAR-CCM+ and are subsequently built in 3D-CAD. Each component is built using CAD operations. The benefit of building all components is that you can then modify the circuit board design in 3D-CAD in response to analysis results and re-run the simulation.
When the import completes, a 3D-CAD model named IDF Import 3D-CAD 1 is added to the node. Edit this 3D-CAD model to enter the 3D-CAD environment.