Using the Toolbars
Like the menu bars, the toolbars are typical of GUI-based applications, providing easy access to the most common actions.
You can control the appearance of toolbars with various methods, including moving, showing and hiding, and creating them.

Moving a Toolbar
The toolbars always remain near the top of the workspace, just below the menu bar. They cannot be floated freely, or docked on the sides or bottom. However, they can be moved relative to each other.
Dragging downwards creates a row for the toolbar, dragging left and right repositions it relative to the other bars.
Hiding a Toolbar
You can hide a toolbar using the menu or the right-mouse click:
-
Select to display the submenu.
All the visible toolbars have the checkbox activated. Select the toolbar name to hide and click the left mouse button to deactivate the checkbox and hide that toolbar. The deactivated checkbox appears only if you bring up the submenu a second time.
- Right-click over any of the gray space of the toolbar (not directly over a button) to display a pop-up menu identical to the submenu.
Displaying a Toolbar
You can display a toolbar using the menu or the right-mouse click:
-
Select .
A hidden toolbar has the checkbox deactivated. Select the toolbar name to show and click the left mouse button to activate the checkbox and show that toolbar. The activated checkbox appears only if you bring up the submenu a second time.
- Right-click over any of the gray space of the toolbar (not directly over a button) to display a pop-up menu identical to the submenu.
Customizing a Toolbar
You can add, delete, or relocate buttons to toolbars.
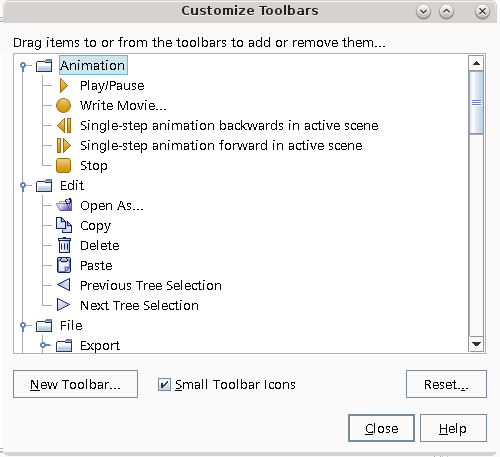
This method allows you to make any of the following changes to toolbars:
- Adding new buttons by dragging them from the dialog to the toolbar
- Deleting existing buttons by dragging them from the toolbar to the dialog
- Relocating existing buttons (by dragging them from the dialog to the new location) either within a toolbar or between toolbars
Creating a Toolbar
To add a toolbar to your workspace:
- Click the New Toolbar button at the bottom of the Customize Toolbars dialog.
- In the
New Toolbar dialog, name the new toolbar.
- After you click
OK, customize your new toolbar before you close the
Customize Toolbars dialog.
Once a new toolbar has been saved, it appears along with other toolbars on the menu.
It is also possible for a NetBeans plugin to create a toolbar when it is installed. To learn how to create your own modules, contact Siemens Digital Industries Software support.