Import the Parts and Assign Tags
You import all the part files that make up the HVAC duct geometry and assign the appropriate tags to the parts and surfaces.
To save the file as a new simulation template:
- Select File and click Save to Template.
- In the Save dialog, navigate to your working directory and save the file as wrappedHVACduct_template.simt.
To import the geometry parts:
- Select File and click .
- In the Open dialog, navigate to your working directory, multi-select all the .dbs files contained within the WrapperInput folder and click Open.
-
In the Import Surface Options dialog, disable the
Open Geometry Scene After Import option and click
OK.
All the imported geometry parts are added to the node.
-
Create a composite part that contains all the imported geometries:
- Multi-select all the imported parts (Adjuster, Clip, Duct, Flap, Patches, and Vanes).
- Right-click one of the selected parts and select Composite.
- Rename the Composite part to Duct Geometry.
- Multi-select all the parts under the Duct Geometry composite and set Tags to Part_WrapperInputs.
-
Expand the Surfaces node under each part contained in
the Duct Geometry composite.
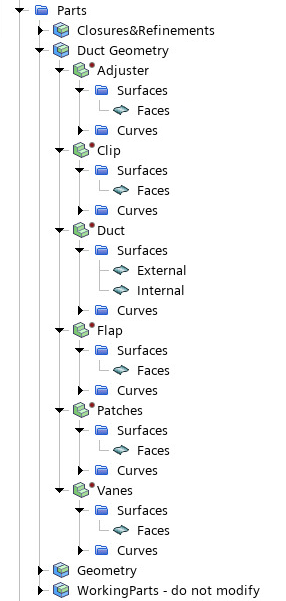
- Multi-select the nodes of the Adjuster, Clip, Flap, Patches, and Vanes parts and set Tags to Surface_DuctVanes.
-
Expand the part node and set Tags as follows:
Node Tags External Surface_DuctExterior Internal Surface_DuctInterior
After assigning the tags to the parts and surfaces, you can
execute the mesh operations:
- Right-click the Operations node and select Execute All.
-
To visualize the volume mesh, open the
05_VolumeMeshDuct.
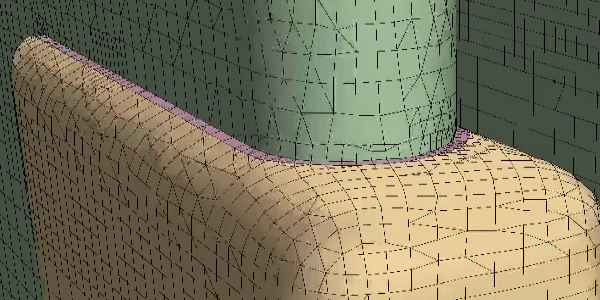
You can observe that the methods explored in the first and second parts of this tutorial result in slightly different meshes. This is particulary evident at the regions where surfaces interact: partly because of the surface wrapper; partly because of the tolerance gaps present in the second duct geometry.
For an example, you can compare the volume mesh scenes of the central vane and the clip at the vent:
unifiedHVACduct - 05_volumeMeshDuct: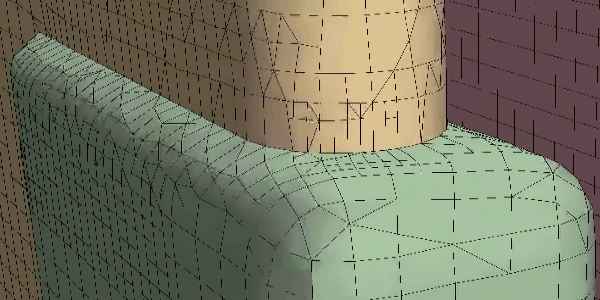 wrappedHVACduct - 05_volumeMeshDuct: