Creating Composite Parts (Assemblies)
In order to help organize leaf-level parts or other composite (subassembly) parts, you can create a composite part.
Two general methods to create composite parts are:
- create a new empty composite part and move existing leaf-level parts or other composite parts into it afterwards
- create a composite part from two or more existing parts
Creating a New Empty Composite Part
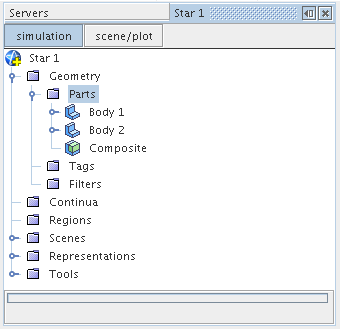
To create a new empty composite part (that does not contain any other parts):
-
Right-click the
Parts node and select
New Composite Part from the pop-up menu.
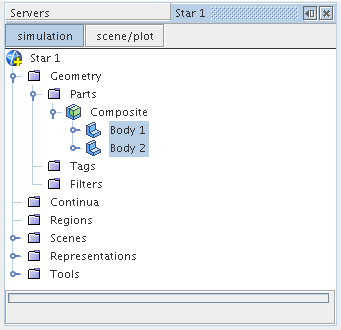
A new composite part node appears, with the default name Composite:
-
Leaf-level or other composite parts can be moved into the new composite part by selecting them and dragging and dropping them into the composite part node.
This results in the parts becoming children of the new composite part, as shown in the arrangement below:
Any number of new composite parts can be created using this method.
Deleting Empty Composite Parts
To delete a composite part that does not contain any other parts:
-
Right-click the Parts node and select Delete
Empty Parts.
A Delete Empty Parts dialog appears.
- In the Delete Empty Parts dialog, select the parts that you want to delete and click OK.
Creating Composite Parts from Other Parts
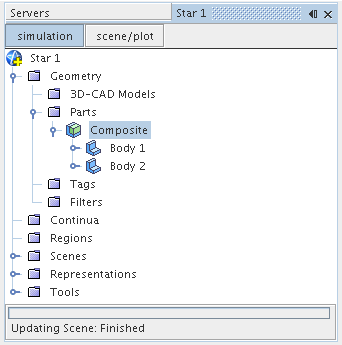
A new composite part can be created directly from two or more existing parts so that the selected parts automatically become children of the new composite part.
For example, to make two leaf-level parts the children of a new composite part:
-
Select the leaf-level parts, right-click, and select
Composite from the pop-up menu.
A new node with the default name Composite is created containing the selected leaf-level parts as children:
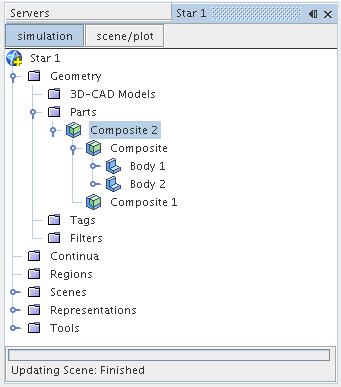
Similarly, a new composite part can be created from two existing composite parts, such that they automatically become children or subassemblies of the new composite part.
-
As for leaf-level parts, select the two composite part nodes, right-click, and select
Composite in the pop-up menu.
In this instance, composite parts Composite and Composite 1 are rearranged to become subassemblies of new part Composite 2:
Creating tags on Composite Child Parts
For composite parts the Manage Tags on Children... action allows you to associate tags with the child parts of the assembly. These tags can then be used to reference the parts, part surface, and part curves in filters.
-
Create the required tags for the simulation.
For more information, see Using Tags.
-
Right-click the node and select Manage Tags on
Children...
The Edit tags on assembly dialog appears:
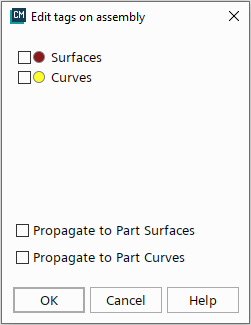
Tags can be applied to any or all of the composite child parts, and can also be optionally extended to their surfaces or curves using the Propagate to Part Surfaces and Propagate to Part Curves options respectively.
- In the Edit tags on assembly dialog, select the required tags and propagation options.
- Click OK.