Preparing a Scalar Scene
Prepare a scalar scene to display the pressure field around the plate. Include the plane section in a separate scalar displayer so that the opacity setting can be adjusted independently.
- Create a scalar scene.
- Right-click the Scalar Scene 1 node and select .
-
Edit the Scalar Scene 1 node and set the following
properties:
Node Property Setting Scalar 1 Contour Style Smooth Filled  Parts
Parts
Parts Scalar Field
Function Pressure Scalar 2 Opacity 0.5 Contour Style Smooth Filled Parts
Parts Scalar Field
Function Pressure Color Bar
Visible Deactivated -
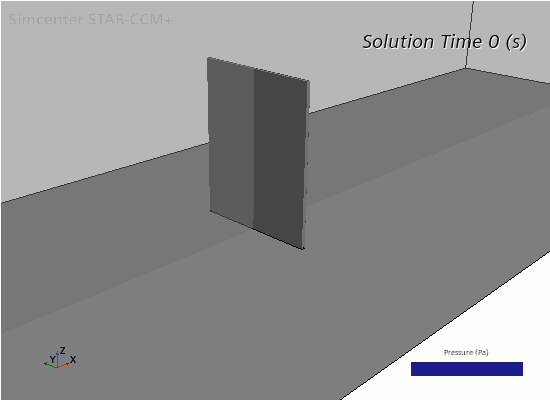
Position the scene as shown below.
Add an annotation to the scene to show the current solution time:
- Expand the node.
- Click the Solution Time node and drag it into the scene. Release the mouse button anywhere in the scene.
-
Move the annotation to the top-right of the scene using click-and-drag.
Add a solution time annotation to the mesh scene:
- Display the mesh scene in the Graphics window by selecting the Mesh Scene 1 tab.
- Using the same technique as described above, add a Solution Time annotation to the scene.
-
Save the simulation.
Note In transient cases, it is often useful to export copies of scalar scenes while the simulation is running. These image files can then be used to visualize the solution in an animation. The next page in this tutorial runs through the steps for setting up automatic scene export. If you do not wish to export scenes automatically during the co-simulation, you can jump directly to Specifying Co-Simulation Settings.