Setting Up Monitors
Create reports to monitor the displacement of the upper corners of the plate in the x-direction, the traction load, and the moment about the z-axis, during the co-simulation.
- In the Graphics window, click the Mesh Scene 1 tab.
- Right-click the Derived Parts node and select
-
In the
Create Point Probe dialog, set the properties as follows:
Property Setting Input Parts X 0.0 m Y 0.04 m Z 0.1 m Display No Displayer -
Click
Create then
Close.
A node, Point, is added beneath the Derived Parts node.
To create another point probe for the other corner:
- Copy the node and paste it onto the Derived Parts node.
- Rename the node to Upper +Y, and the to Upper -Y.
- Edit the Upper -Y node and set Point to [0.0, -0.04, 0.1] m,m,m.
To make the points move with the plate when the morpher moves the mesh:
- Multi-select the Upper +Y and Upper -Y nodes and activate Follow Motion.
Having created point probes on the upper corners of the plate, you can now create reports that report the displacement of these corners:
- Right-click the Reports node and select .
- Rename the node to X Displacement Upper +Y.
-
Set the following properties:
Property Setting Field Function Parts Smooth Values Activated - Create another Maximum report for the other corner.
- Rename the report that you just created, , to X Displacement Upper -Y.
-
Set the following properties:
Property Setting Field Function Parts Smooth Values Activated
Use the displacement reports to create monitors and a plot:
- Multi-select the X Displacement Upper +Y and X Displacement Upper -Y reports.
- Right-click one of the reports and select Create Monitor and Plot from Report.
-
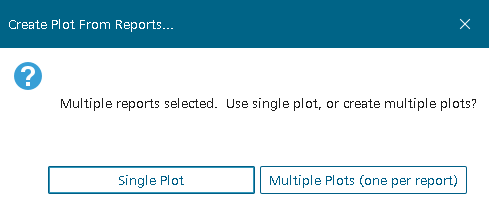
In the
Create Plot From Reports dialog, select
Single Plot.
The report monitors are displayed under the Monitors node, and the plot is shown under the Plots node. - Rename the node to Displacement Plot.
Create two more reports to monitor the traction load and moment on the plate:
- Right-click the Reports node and select .
-
Select the
node and set the following properties:
Property Setting Direction [1.0, 0.0, 0.0] (default) Force Option Pressure + Shear (default) Parts - Right-click the Reports node and select .
-
Select the
node and set the following properties:
Property Setting Axis [0.0, 0.0, 1.0] (default) Force Option Pressure + Shear (default) Parts
Create two separate plots for the force and moment reports:
- Multi-select the Force 1 and Moment 1 reports.
- Right-click and select Create Monitor and Plot from Reports.
- In the dialog that appears, select Multiple Plots (one per report).
Finally, verify the trigger for monitoring the data is set to time-step:
- Expand the Monitors node and multi-select the four report monitors.
- Make sure that Trigger is set to Time Step.
- Open all plots.
- Save the simulation.