Defining the Battery Modules
You define two battery modules—each with four battery cells in series and two in parallel, then you specify the geometry parts for each of the cells in both modules.
-
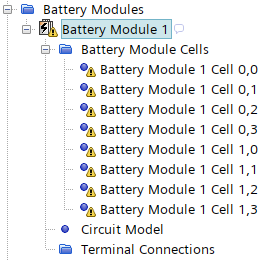
Create the first battery module.
The battery module and all associated battery cell nodes appear with a caution symbol on them—which specifies that they require further set-up. In this case, they require geometry parts to be assigned.
-
Create the second battery module.
- Right-click the Battery Module 1 node and select Copy.
- Right-click the Battery Modules node and select Paste.
- Rename the copy to Battery Module 2.
Before you assign the battery geometry parts to the battery
cells, you need to check that the names of the battery cells all follow the same
pattern. Therefore, you rename the geometry part Cell to
Cell (1 x 1) for the mapping assignment to work
correctly.
- Rename the node to Cell (1 x 1).
-
Assign battery geometry parts to the battery cells in Battery Module 1 using
the Assign By Mapping approach.
-
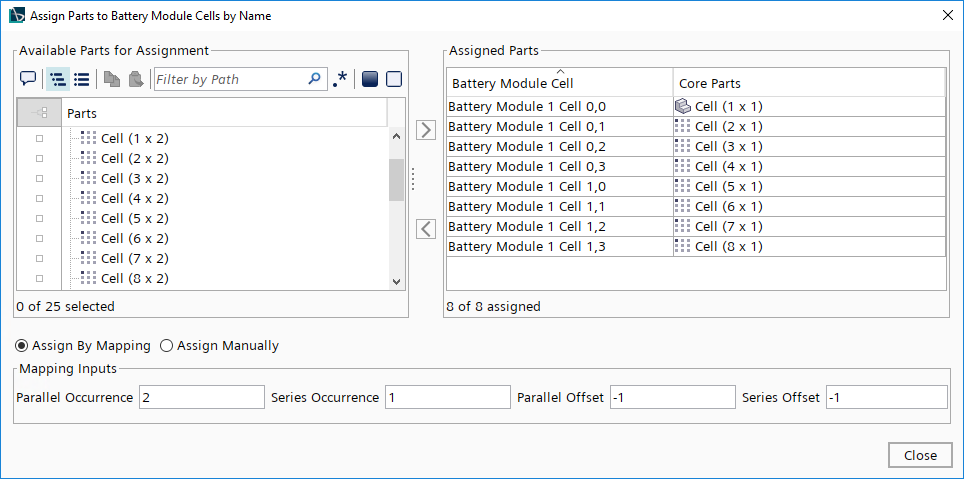
In the Assign Parts to Battery Module Cells by
Name dialog, in the Mapping
Inputs group box, set the following:
Mapping Input Setting Parallel Occurrence 2 Series Occurrence 1 Parallel Offset -1 Series Offset -1 
-
Click OK.
-
In the Assign Parts to Battery Module Cells by
Name dialog, in the Mapping
Inputs group box, set the following:
The Assign Parts to Battery Module Cells by
Name tool provides a flexible approach to assigning parts to their
respective battery module cells. The option to assign by mapping is useful, however,
there is also the option to assign parts to battery module cells
manually.
-
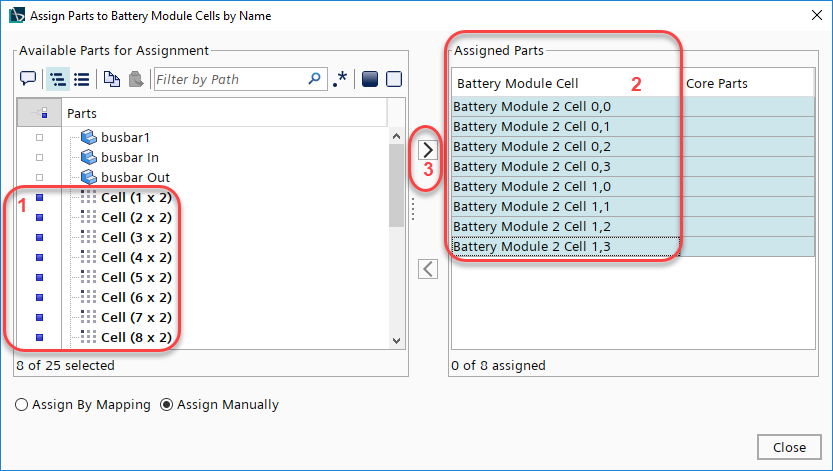
Assign battery geometry parts to the battery cells in Battery Module 2 using
the Assign Manually approach.
-
In the Assign Parts to Battery Module Cells by
Name dialog, above the Mapping
Inputs group box, select Assign
Manually.
-
Click the arrow pointing to the right.
-
Check that the parts and cells are matched correctly, as shown
below.
-
In the Assign Parts to Battery Module Cells by
Name dialog, above the Mapping
Inputs group box, select Assign
Manually.
- Save the simulation.