Animating the Solution
Simcenter STAR-CCM+ offers a range of options to animate a solution including Screenplays. To produce a screenplay for this application, you create a vector warp to translate the surface coordinates by the modal displacement along the blade.
To create a vector warp:
- Right-click the Derived Parts node and select .
-
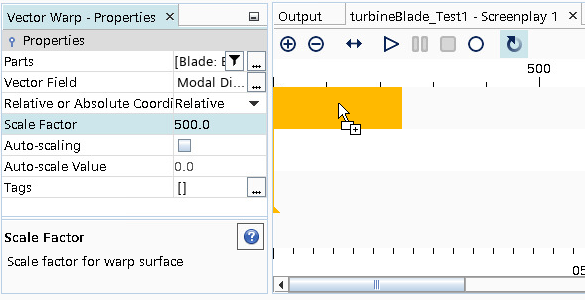
In the Edit dialog set the following properties:
Property Value Input Part and Vector Modal Displacement Scale Factor 500 Display No Displayer - Click Create then Close.
- Select the node, deselect all regions and select .
-
To create a screenplay:
-
Select the node and drag and drop the Scale
Factor property into the Screenplay
1 output window as shown below:
-
Expand the Action 1 node and set the following
properties:
Node Property Value Action 1 Duration 5  Scale Factor
Interpolation Mode Spline  0.00: 500
Value -500 0.50: 500Value 500 (default) 1.00: 500Value -500 Director Target Frame Rate (fps) 120 End Duration 0 This screenplay set up creates an animation of one full oscillation cycle. To visualize the continuous oscillation of the blade the End Duration is set to zero which resets the screenplay immediately back to the beginning once the action is complete.
-
In the vis toolbar, click
 (Save-Restore-Select
Views) and select .
(Save-Restore-Select
Views) and select .
-
Click
 (Play) in the
Screenplay 1 output window.
(Play) in the
Screenplay 1 output window.
The final animation is displayed below:
-
Select the node and drag and drop the Scale
Factor property into the Screenplay
1 output window as shown below: