Interactive Sketch Mode
This mode allows you to define free-hand sketches directly on the destination faces. The sketches are then imprinted to allow for control curves or constraints to be defined on the surface.
-
In the Global tools panel, click
 (Offset/Imprint selected edges).
-
Select Interactive Sketch in the Edge Create
Mode option.
The following image shows the Offset/Imprint selected edges tool in Interactive Sketch mode.

-
To select faces for the Destination Faces, select the
faces in the graphics window and click

-
To remove faces, select the faces in the graphics window and select
 .
.
-
To remove all faces, click
 .
If all faces a re removed during a sketch operation, the sketch will be invalidated and the sketch options are reset.
.
If all faces a re removed during a sketch operation, the sketch will be invalidated and the sketch options are reset. -
Create a sketch:
-
Click Start Sketching and select the start point
on the destination face within the graphics window.
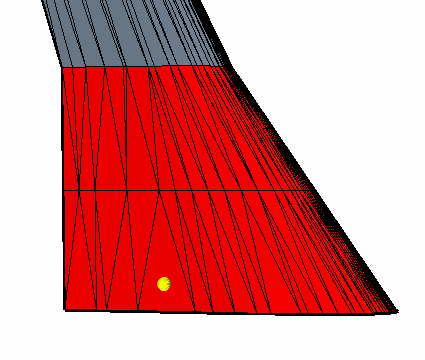
Within the graphics window the yellow sphere indicates the last sketch point made. For complex sketch shapes it is advisable to create the shape in stages, executing an imprint operation at the end of each stage, to incrementally create the desired edge definition.
-
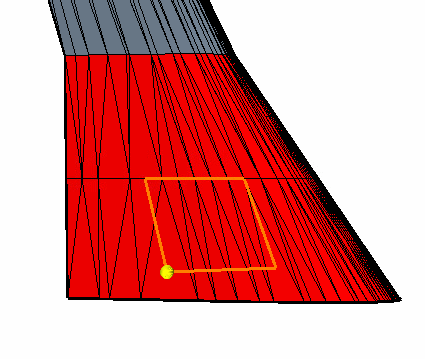
In turn, select each of the desired sketch point locations on the
destination faces within the graphics window.
Within sketch mode you can snap the sketch point to the closest face, vertex, or edge by activating and deactivating the selection control buttons at the bottom of the graphics window. Each time a point is selected the corresponding point type and coordinates are displayed within the output window.

-
To close the sketch loop, select Close Sketch
Loop.
Do not attempt to close the sketch manually. A sketch is not considered closed if the closing sketch point and first sketch point coincide. Once a sketch loop is closed a new disconnected sketch is started with the following message appearing in the output window when the new start point is selected:Info: Last sketch was closed and cannot be added to. Starting a new Sketch
-
Click Start Sketching and select the start point
on the destination face within the graphics window.
-
To start a new sketch on the same face without closing the previous sketch,
deactivate the Continue from last option and select
Start Sketching.
If you want the new sketch points to be connected, ensure that you reactivate the Continue from last option once the new start point has been selected within the graphics window.
- To clear the entire sketch, click Clear Sketch(es) and in the Are you sure? window select Yes.
-
To remove the last sketch point, click
 (Undo the last sketch point).
-
To reapply the last sketch point, click
 (Redo the last sketch point).
-
Specify the imprint properties:
-
To execute the operation, click Imprint Sketch
Edges.
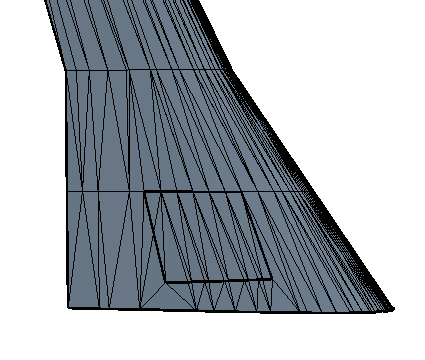
When complete, the Output window shows feedback from the operation.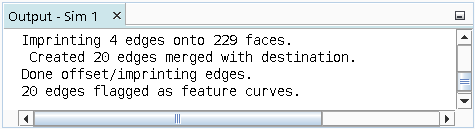
-
If the imprinted sketch is incorrect, click
 (Undo)