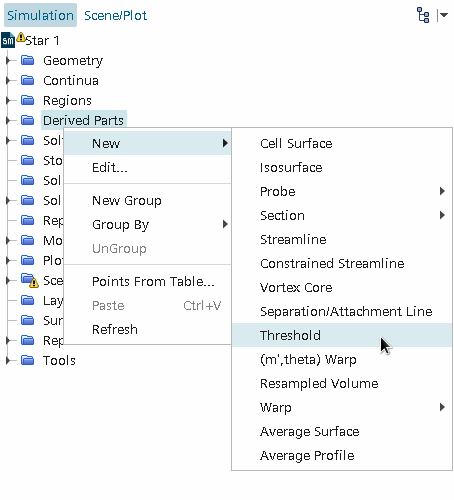
Identification And Visualization Based On Cell Metrics

Using cell-based threshold metrics, the bad cells in the interior of the mesh can be identified and isolated for further investigation.

This technique is applicable for finding cells that are based on:

  • negative volumes;
  • cell skewness;
  • face validity metric;
  • cell quality metric; and
  • volume change metric

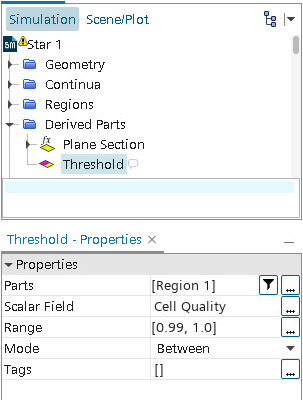
The method that is used to identify and visualize cells is identical for all the above scalars and is interchangeable once a threshold has been created. That is, the same threshold can be used to investigate any or all of the scalars one at a time by changing the properties of the node.

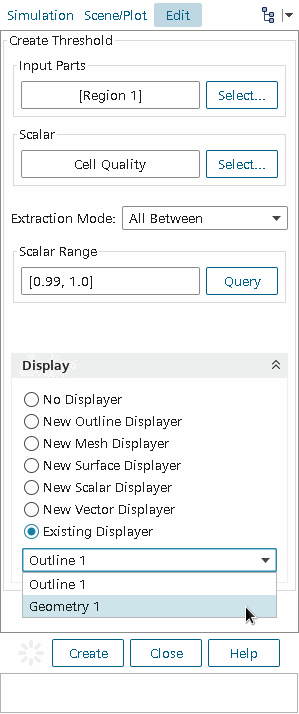
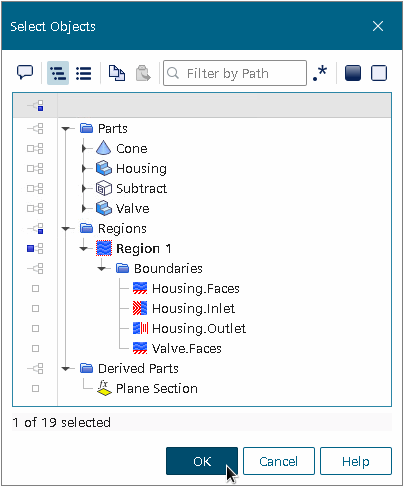
To access the above cell metrics as part of a threshold, first initialize the solution with the appropriate physical model mesh metrics activated. In this case, to access the cell metrics, select the Three Dimensional Space model before doing the initialization. If you do not perform this step, only the cell quality metric is then available by default.

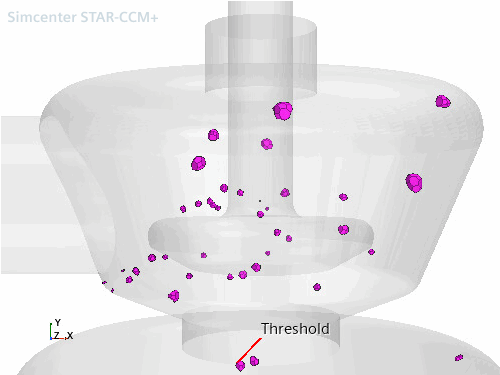
A geometry scene must exist or one must be created in order to display the model. Simplifying the model to show only the outline of the geometry can assist the visualization of threshold cells. To display only the outline, edit the Geometry 1 node for the scene so that it contains no parts, or hide all the parts. Alternatively, you can create a new displayer.

To create a threshold, right-click on the Derived Parts node and select New Part > Threshold... from the context menu.

The Create Threshold dialog appears, which allows the selection of the input parts, threshold scalar, extraction mode, value range, and display options.

To identify interior cells (as opposed to boundaries), the Input Parts list must contain the mesh region or regions nodes of interest. To edit the list, click Select... to open the Select Objectsdialog:

Once you have selected the desired region or regions, click the OK button. The threshold scalar field function can be selected next. Click Select..., and scroll through the list to select the one of interest.

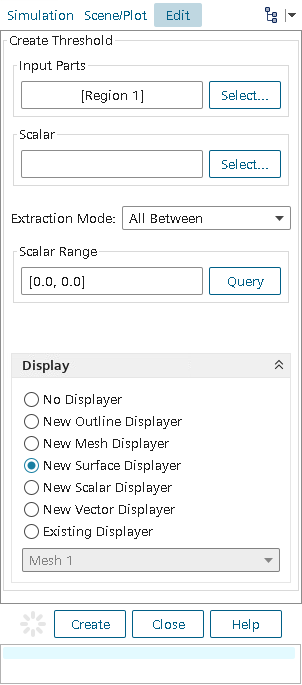
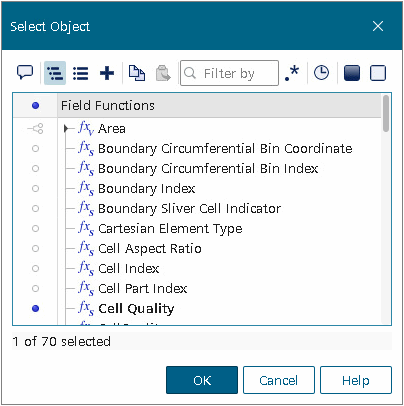
To check for one of the cell metrics that were listed earlier, choose from the scalars Cell Quality, Volume, Skewness Angle, Face Validity, or Volume Change.

To get an idea of the scalar value range, the Scalar Range Query button can be pressed. The Extraction Mode option can then be used to select how you want to identify the cells for the scalar threshold. Typically, you would want to select cells either above or below a given value but you can also select cells within a range or outside (below min and above max) a range.

The last item to decide is how the new threshold node is displayed. You can select not to create a displayer, to create a new geometry, scalar, or vector displayer, or add to an existing displayer. When selecting the last option, you can decide which pre-existing displayer the new node is added to. Use this option here and add the threshold part node to the Geometry 1 displayer.

Click the Create button to create the threshold part. This may take several seconds depending on the number of regions and type of scalar selected. Press the Close button on the dialog once the process is complete. A new threshold node is created in the Derived Parts node. To view the new threshold node properties, click the node:

In the above case, the current geometry scene is updated with the results of the threshold check. With the threshold node selected, the cells are shown highlighted in the display:

You can rotate, translate, and zoom the display in order to investigate the poor quality cells. Thereafter, the Properties of the threshold node can be changed directly in order to update the display. Alternatively, you can right-click on the threshold node and select Edit Part in Current Scene in order to return to the original dialog used to create the threshold.