Setting Up Tab Connectors
Import and configure the tab connectors.
A tab connector has been prepared for this staggered case.
To import the tab connector into the simulation:
- Select from the menu bar.
- In the Open dialog, multi-select the post1Cylindrical.x_b, post2Cylindrical.x_b, and strapCylindrical.x_b files, and click Open.
-
In the Import Surface Options dialog, Click
OK.
The default Import Surface Options are appropriate for this tutorial.
The imported tab connector includes: a strap, a positive post, and a negative post.
-
Right-click the
node and select
Setup Tab Connections.
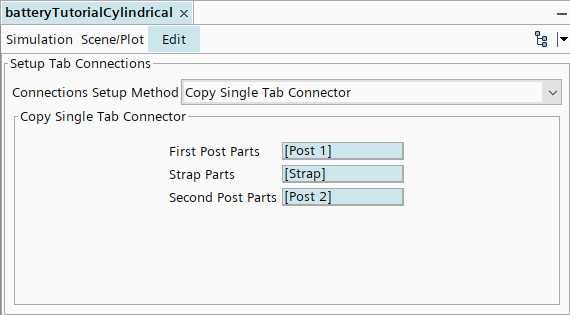
The Setup Tab Connections Edit tab appears.
The first post part is the negative post that connects the negative tab of the first battery cell to the positive tab of the second cell. The positive tab in the first battery cell always stays open. The tab connector is copied to connect the tabs of the second and third cell.
- In the Setup Tab Connections Edit tab, click to the right of the First Post Parts property.
- In the Set Connection Geometry Parts dialog, select Post 1.
- Click OK.
-
Repeat the previous steps and assign the
Strap part to
Strap Parts, and the
Post 2 part to
Second Post Parts.
- Click Apply then Close.
- Save the simulation.