Creating a New Cell Set Using a Geometric Range
The geometric range option allows cell sets to be created based on cells that are contained fully within a Cartesian based block, extending in the x, y and z directions.
If a valid scene is currently displayed, the minimum and maximum geometric coordinates can be set either graphically or manually, otherwise they can be entered manually by hand if a scene is not open.
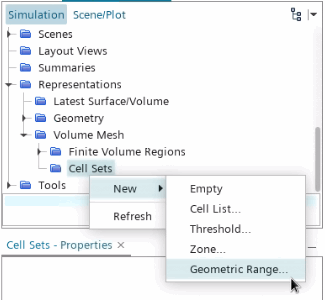
To access the geometric range options,
right-click on the node and select from the pop-up menu:
The Cell Set Geometric
Range dialog appears:
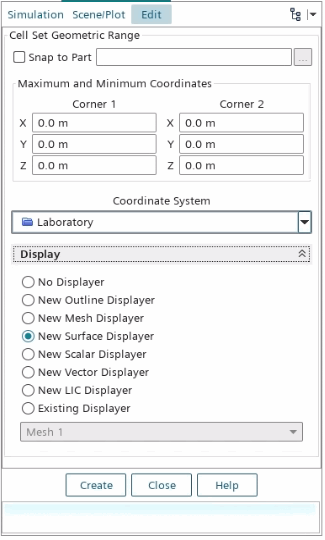
The dialog can be used to enter the maximum and
minimum coordinate values in each of the three cartesian directions. Alternatively, the
graphical display tool, which is automatically displayed in the scene with the bounding
box extending to the model maximum and minimum coordinate directions, can be used to
specify the geometric range:
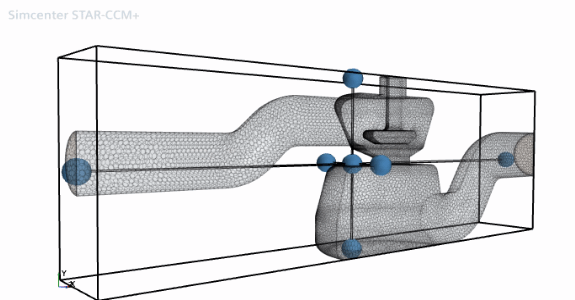
Click and drag on the spherical balls to extend
or reduce the box size in each direction. Right-clicking and dragging vertically on the
box allow you to resize all the coordinates of the box simultaneously. Clicking using
the middle mouse button on the box allows it to be translated in each direction. An
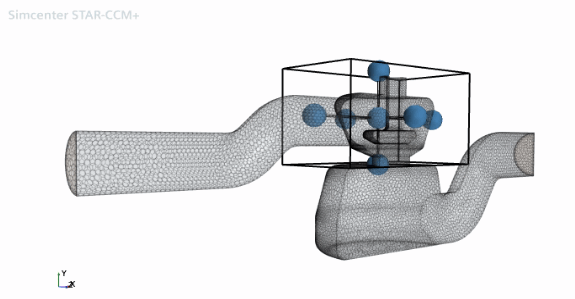
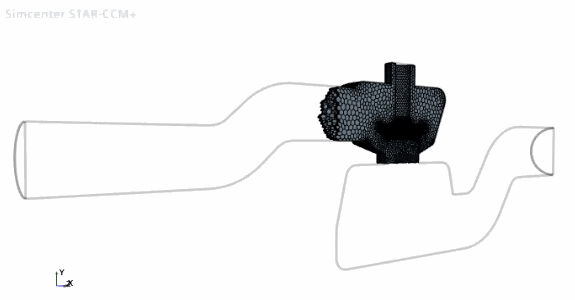
example showing a reduced box size in the vicinity of the valve region of the model is
shown below:
Then select the Display option on the dialog to determine how the new cell set part is
added to the current scene. Click Create to create the cell set
based on the supplied information. The new cell set is then displayed depending on the
Display options selected:
Additional cell sets can be created by repeating the above operation. Press the Close button when you are done.