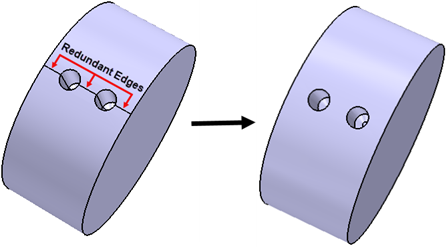
Removing Redundant Edges
Redundant edges can appear after you execute a defeature or imprint operation. If left untouched, these free edges can affect mesh generation.
-
To launch the tool, do one of the following:
- Right-click the Features node in the 3D-CAD simulation tree and select .
- In the graphics window, select one or more bodies, faces, or edges, then right-click and select .
The Remove Redundant Edges panel appears on the left of the graphics window.
- In the Remove Redundant Edges panel, if you wish to change the type of chosen entity, set Selection Mode to the one you require (body, face, or edge).
- To remove one or all of your selections, right-click the selection in the list and choose the corresponding action.
- To select additional entities of the chosen type, press <CTRL> and select additional entities within the graphics window. These selections are added to the box under Selection Mode.
- Click OK.