Filling Multiple Holes on a Sheet Body
The fill holes operation identifies holes and boundary cut outs on a surface of a sheet body and allows you to fill them in a single operation.
-
To fill the holes on a sheet body:
- Right-click on the Feature node and select the Fill Holes option. Select a sheet body in the 3D-CAD View scene.
- Alternatively, in the 3D-CAD View scene, right-click on a sheet body and select.
The Fill Holes panel appears.
- To add further sheet bodies, click in the Sheet Bodies box then select them in the graphics window.
-
To identify holes that you want to exclude from the hole-filling process:

-
To identify boundary cut-outs that you want to fill:
- Click inside the Edges To Delete box.
- Select the edges of the boundary cut out. You can select edges for multiple cut-outs at the same time.
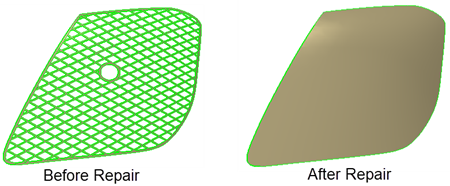
The following example demonstrates how to fill a boundary cut out using the Edges To Delete panel.
-
Click
OK in the
Fill Holes panel to complete the feature.
A Fill Holes node is added to the 3D-CAD feature tree. If the Fill Holes node appears with a warning sign, then some of the holes were not successfully filled with a surface.